If you want your electric kettle to last, treat it like precision equipment: use softer or filtered water to cut mineral buildup, descale routinely with mild acid, and avoid overheating or dry-boil conditions. Check seals, cords, and the base for wear, and don’t overfill or run continuous full-capacity boils. These habits reduce stress on the element and electronics — and there are a few targeted maintenance steps that will extend life much more than you might expect.
Key Takeaways
- Descale regularly using citric acid or diluted white vinegar and rinse thoroughly after each treatment.
- Use filtered or softened water to minimize limescale and reduce heating-element stress.
- Boil only the amount needed, avoid frequent rapid on/off cycles, and never allow the kettle to dry-boil.
- Empty residual water, leave the lid open to air, and keep the base and contacts dry to prevent corrosion.
- Inspect and replace worn seals, cords, or elements at first signs of damage, corrosion, or electrical faults.
Understanding Common Causes of Kettle Failure
Why does kettles fail prematurely? You’ll find failures stem from predictable mechanical, electrical, and user-driven factors. Thermal cycling stresses heating elements and welds; repeated rapid on/off cycles generate microcracks and eventual open circuits. Scale deposits insulate the element, causing localized overheating and premature burnout. Water ingress into the base or switch assembly corrodes contacts, creates shorts, and compromises insulation resistance. Mechanical strain from dropping or rough handling deforms latches and seals, producing misalignment that prevents proper lid closure and selective heating. Overfilling or dry-boil operation defeats temperature cutouts and triggers element failure. Inadequate ventilation around the base elevates internal temperatures, reducing lifespan of adhesive bonds and plastics. Using incorrect voltage or poor mains connections causes excessive current draw and contact arcing. Regular inspection for corrosion, loose wiring, worn seals, and scale accumulation lets you detect faults early. Addressing these technical issues reduces risk and keeps operation safe. Regular descaling every 1-3 months using white vinegar helps prevent mineral buildup that can shorten kettle life.
Choosing the Right Water to Reduce Limescale
If you want to minimize limescale and extend kettle life, the water you choose matters: hard water with high calcium and magnesium deposits more scale, while softer water or water treated to remove hardness dramatically reduces buildup on heating elements and inside the kettle. You should test your supply: use a simple test strip or check municipal water reports for hardness measured in mg/L or ppm. Aim for ≤120 mg/L (≈7°dH) to reduce rapid scaling; lower is better. If your tap exceeds this, consider using filtered water (activated carbon plus ion-exchange or reverse osmosis) for boiling. Avoid distilled water for long-term use only if manufacturer warns against it, since its low conductivity can affect some kettle sensors; consult the manual. When filling, use cold water from the main supply rather than hot from a domestic tank, because hot stored water often has higher dissolved mineral concentration and microbial risk. These choices reduce mineral deposition and preserve thermal efficiency and electrical components. Glass kettles made from borosilicate glass are preferable because they resist scratches and stains and help maintain kettle longevity.
Descaling Methods That Actually Work
How often should you descale depends on water hardness and usage, but when you do it, use proven chemical or mechanical methods rather than guesswork. You’ll prioritize safety, equipment longevity, and consistent thermal efficiency by following controlled procedures and manufacturer guidance. Use gloves, ventilate, and avoid mixing chemicals.
- Vinegar solution — dilute white vinegar 1:1 with water, boil briefly, let sit 20–30 minutes, rinse thoroughly; effective on light to moderate scale but corrosive if overused.
- Citric acid — 1–2 tablespoons per litre, heat and soak 15–30 minutes; neutral pH after rinsing, safe for most metal and plastic components.
- Commercial descaler — follow concentration and dwell-time instructions precisely; choose products rated for electric kettles and rinse per label.
- Mechanical removal — use a non-abrasive brush or nylon scraper for localized deposits; never use metal tools that scratch heating elements.
After any method, perform multiple rinses, run a full boil and discard to remove residues and ensure safe operation. Regular maintenance, such as emptying the kettle after use and wiping the interior with a soft cloth, helps prevent heavy buildup and prolongs lifespan of the appliance regular maintenance.
Daily Habits to Prevent Wear and Tear
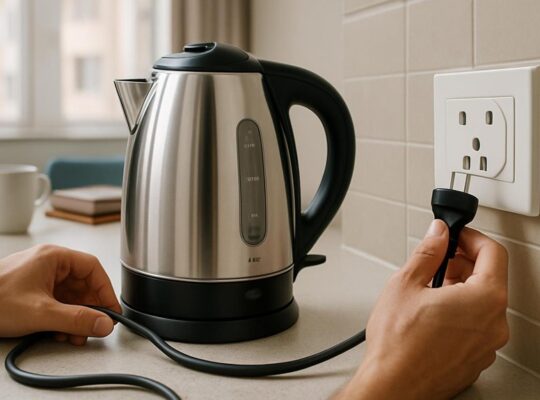
Want to keep your kettle working reliably for years? Adopt routine habits that minimize mechanical and electrical stress. After each use, unplug the base and allow the unit to cool before handling; thermal cycling contributes to seal and component fatigue. Empty residual water to prevent standing-water corrosion and mineral buildup in crevices; leave the lid open for ventilation to evaporate trapped moisture. Wipe the exterior and interior lip with a lint-free cloth to remove splashes and deposits that can compromise switches or gaskets. Check the power cord and plug weekly for frays or loosened connections; a secure, undamaged cord prevents intermittent contact and overheating. Avoid dropping or striking the kettle—mechanical shocks can dislodge heating elements or damage sensors. Store the kettle on a stable, level surface away from stovetop heat and steam sources. Keep the user manual and maintenance schedule accessible, and log any recurring anomalies to address wear early and safely. Descale the kettle regularly to prevent limescale buildup and maintain heating efficiency monthly.
Proper Filling and Boiling Practices
Why fill only to the marked level and no more? You avoid boiling-over, prevent water contact with heating elements or seals, and maintain correct steam flow—each reduces corrosion and electrical risk. Fill according to capacity markings and never exceed the max.
- Measure precisely: use the kettle’s internal scale or a measuring cup so you don’t overfill.
- Boil only what you need: smaller volumes heat faster, reducing stress cycles on the thermostat and heating core.
- Stop before dry-boil limits: ensure the minimum water level is met; repeated low-water heating damages the element and sensor.
- Use filtered water when hard-water is present: mineral deposits form faster at boiling temperatures, impairing heat transfer and causing localized overheating.
Operate the kettle on a stable surface, close the lid fully to direct steam through vents, and allow it to cool before refilling. These practices reduce mechanical and thermal fatigue, extending service life safely. For best long-term performance, choose durable materials like stainless steel that resist corrosion and aid heat retention.
Handling and Cleaning the Exterior and Lid
Wipe the kettle exterior regularly with a damp, lint-free cloth and a mild detergent to remove grime and prevent abrasive buildup that can damage the finish. Open and clean the hinged lid mechanism, wiping hinge areas and inner surfaces to prevent sticky residue and assure a proper seal. Avoid soaking electrical parts; if residue is stubborn, use a soft brush and isopropyl dampened cloth to target spots. Regular descaling with vinegar solution prevents limescale buildup and helps maintain heating efficiency.
Wipe Down Regularly
How often you wipe the kettle’s exterior and lid affects both hygiene and component longevity, so make it a quick routine after every few uses. You’ll reduce residue build-up, prevent corrosion at seams, and limit microbial growth without exposing electrical parts to moisture. Use a damp lint-free cloth with mild detergent; wring it so water doesn’t drip into vents or switches. Dry immediately with a clean microfiber to avoid streaks and trapped moisture.
- Unplug and cool the kettle fully; remove any detachable base before wiping.
- Wring the cloth tightly; follow seams and the lid rim without forcing moisture into joints.
- Avoid abrasive pads or solvents that degrade coatings and seals.
- Inspect seals and switch housings for moisture; dry and ventilate if found.
Clean Hinged Lid
Wondering how to keep the hinged lid functioning smoothly and hygienically? You should inspect the hinge and sealing surfaces weekly. Unplug the kettle and allow it to cool before you work. Use a soft brush and a cloth dampened with a mild detergent solution to remove limescale, debris, and food particles from the hinge area and lid underside. Avoid soaking the entire lid if it contains electrical components; instead, wipe and dry immediately. For stubborn deposits, apply a 1:1 white vinegar–water solution, leave for 5 minutes, then rinse thoroughly with a damp cloth. Dry all metal and plastic parts completely to prevent corrosion and microbial growth. Reassemble only when dry, and test the hinge motion; it should open and close without resistance.
Protecting the Heating Element and Base
Protect the kettle’s heating element and base by following three simple practices that prevent damage and maintain efficiency. Descale regularly to remove mineral buildup that insulates the element and raises energy use. Never dry-boil the kettle and always keep the base dry to avoid overheating and electrical faults. Electric kettles are more energy-efficient than stovetop kettles, but regular care helps preserve that efficiency.
Descaling Regularly
Because mineral scale builds up faster than you might notice, descaling your kettle on a regular schedule is the single most effective step to protect the heating element and base from premature failure. You should remove limescale before it insulates the element, forces longer heat cycles, or causes localized overheating. Use mild acids (white vinegar or citric acid) in manufacturer-recommended concentrations, rinse thoroughly, and run a clear-water boil afterward to purge residues.
- Flush and fill: drain kettle, add solution to fill line, avoid overfilling near electrical components.
- Dwell time: let solution sit per instructions (typically 15–30 minutes); don’t exceed recommended duration.
- Agitate and scrub: use a nonabrasive brush on exposed elements and base.
- Rinse verification: repeat rinses until no odor or film remains; test with one short boil.
Avoid Dry Boiling
Descaling helps prevent scale-related hotspots, but even a perfectly clean kettle can be damaged if it’s run dry. You should never switch the kettle on without sufficient water covering the heating element or internal sensor. Dry boiling causes rapid, uneven heating that deforms elements, degrades insulation, and can trigger thermal cutoff failure. If your model has a dry-boil protection switch, verify it functions periodically; test by following manufacturer-safe procedures or consulting service support. Avoid filling to minimal visible levels — measure so the element stays submerged during heating and turbulence. When reheating, check water level before each cycle. If you detect burning smells, warped metal, or tripped protection, stop use and have the unit inspected. Prioritize prompt repair or replacement to prevent electrical hazards.
Keep Base Dry
Moisture under or around the kettle base is a common cause of corrosion, short circuits, and premature failure of the heating element or its connections, so you should keep the base dry at all times. Follow strict habits to protect electrical contacts and seals; water accelerates oxidation and can bridge low-voltage control circuits. Inspect the base gasket and venting for residue after each use and wipe with a lint-free cloth. If spills occur, unplug immediately and allow full drying before reuse. Avoid placing the kettle on wet countertops or wet mats.
- Drain and dry: empty kettle fully, invert briefly, towel-dry base rim.
- Clean seals: remove limescale and residue from base perimeter.
- Isolate power: unplug before cleaning or drying internally.
- Check vents: ensure drainage and airflow are unobstructed.
When and How to Replace Parts
When should you replace components of your kettle, and how do you know they’re worn rather than merely dirty? Inspect seals, heating elements, cords, and switches monthly. If limescale scrubs off but leakage, sparking, persistent odor, or overheating remain, it’s wear, not dirt. Replace parts at first sign of compromised safety. Regular descaling and inspection help prevent premature failure and maintain efficiency, especially for heating elements that show mineral buildup.
| Component | Symptom of wear | Action |
|---|---|---|
| Power cord | Fraying/exposed conductors | Replace immediately with OEM-rated cord |
| Heating element | Uneven heating, persistent shorting | Replace element or appliance if sealed unit |
| Lid/Seal | Cracks, deformation, water leakage | Install new gasket or lid assembly |
| Switch/Indicator | Intermittent function, sparks | Replace switch module; test continuity |
| Exterior casing | Cracks, heat damage | Replace housing; stop use until fixed |
Follow manufacturer procedures, use insulated tools, unplug before service, and test with a multimeter. If unsure, consult qualified repair or replace the kettle to ensure safety.
Safe Storage and Seasonal Care
Before storing your kettle, make sure it’s completely cooled to prevent pressure buildup and accidental burns. Wipe and air-dry both interior and exterior surfaces to remove moisture that promotes corrosion and electrical faults. Store the unit in a climate-controlled area or insulated container to protect it from freezing temperatures that can crack components and damage seals. Also consider the kettle’s flat heating element when cleaning and storing to ensure long-term efficiency and easier maintenance.
Cool Completely Before Storing
Anyone storing an electric kettle should let it cool to ambient temperature and ensure all internal and external surfaces are dry before putting it away. Cooling prevents thermal stress to metal, seals, and plastic; it also eliminates residual steam that can condense and corrode electrical contacts. When you wait, avoid moving or tilting the unit to keep hot components from shifting.
- Allow at least 30–60 minutes after boiling for equilibrium to ambient temperature.
- Verify base, spout, and lid are cool to the touch and free of visible steam.
- Leave lid open briefly in a ventilated area to release trapped heat before closing.
- Store in a stable, dry location away from direct sunlight, freezing temperatures, and high humidity to preserve materials and insulation integrity.
Dry Interior and Exterior
Why should you ensure both the interior and exterior are completely dry before storing an electric kettle? Moisture left inside or on the housing promotes corrosion, electrical shorts, mold growth, and degraded seals. After cooling, open the lid, pour out residual water, and use a lint-free cloth to wipe the interior surfaces; tip the kettle to drain hidden pockets. Leave the lid ajar in a warm, ventilated area until no detectable dampness remains. Wipe external surfaces, including the base contacts and cord, with a dry cloth; avoid abrasive cleaners that damage insulating coatings. For storage, place the kettle on a clean, dry shelf away from humidity sources. Document the drying step in your maintenance routine to reduce failure risk and extend service life.
Protect From Freezing Temperatures
How do you keep an electric kettle safe when temperatures drop? You’ll prevent freeze damage by controlling storage, draining, insulation, and monitoring. Follow these technical steps to avoid cracked housings, burst seals, and electrical faults.
- Drain completely: open the spout, remove filter, and run closure valves to expel standing water that expands when frozen.
- Dry interior: use low-pressure airflow or desiccant packs to remove residual moisture from heating chamber and electrical contacts.
- Insulate and store above freezing: place the kettle in an insulated container or heated cabinet rated above 0°C, avoiding garages or unheated sheds.
- Monitor periodically: check seals, wiring, and element integrity after cold spells; perform a functional test before regular use.
Signs It’s Time to Replace Your Kettle
When did you last check your kettle for persistent problems? You should inspect for signs that replacement is safer and more efficient. Look for visible corrosion, persistent leaking at seals, and power faults that trip circuits. If heating is uneven or takes far longer, the element may be failing; continue use risks overheating. Burn marks on the base, melted plastic, or a cracked heating element housing are immediate hazards — stop using it. Excessive scale that resists descaling indicates internal degradation and reduced thermal transfer; replacement is better than repeated high-risk repairs. Persistent strange odors, burning smells, or intermittent power suggest electrical faults. If repairs exceed half the kettle’s replacement cost or warranties have expired, replace it. Regular descaling and cleaning with vinegar and citric acid can help prevent some issues before they necessitate replacement.
| Symptom | Severity | Action |
|---|---|---|
| Leak at base | High | Unplug, stop use |
| Burn marks | Critical | Discard, replace |
| Persistent odor | High | Test, replace if unresolved |
Frequently Asked Questions
Can I Use My Kettle for Liquids Other Than Water?
You shouldn’t use it for liquids other than water; oils, milk, sugary drinks and broths can scorch, clog heating elements, cause corrosion and create fire or hygiene risks. Always follow manufacturer guidance and clean/decalcify regularly.
Does Boiling Water in Saltwater Harm the Kettle?
Boiling saltwater can corrode and damage heating elements and inner surfaces, so you shouldn’t regularly use it. Rinse thoroughly after any use, descale frequently, and avoid prolonged exposure to salty residue to maintain safety.
Are There Energy-Saving Boiling Tips for Kettles?
Yes — you can save energy: only boil what you need, use the kettle’s minimum-fill mark, descale regularly for efficient heat transfer, preheat with residual hot water when practical, and use a well-sealed lid to reduce heat loss.
Can Hard Water Damage Cordless Electric Connectors?
Yes — hard water can corrode and deposit mineral scale on cordless electric connectors, causing poor contact, overheating, and failure. You should descale regularly, keep connectors dry, and inspect insulation to maintain safe, reliable connections.
Will Warranty Cover Damage From Lime Buildup?
Usually not; warranties often exclude mineral buildup damage. You should check terms and service bulletins, document cleaning attempts, and use descaling per manufacturer guidelines to avoid voiding coverage and ensure safe, reliable operation.