If you often scald milk, choosing the right electric kettle can make a real difference. You’ll want precise temperature control, a nonstick or enamel interior, and a wide, flat heating base to reduce hotspots. Safety features like auto shutoff and boil-dry protection matter, as does a spout that gives a steady pour for lattes. Learn the specific settings and techniques that prevent burnt aromas—and why some designs outperform others.
Key Takeaways
- Choose a kettle with a concealed flat heating element and stainless-steel interior to minimize hotspots and scorching.
- Use temperature control with 1–2°C increments and a hold function to stop heating before milk denatures.
- Select a capacity that leaves 20–30% headspace to accommodate foaming and prevent boil-over.
- Prefer kettles with anti-overflow/foam detection or automatic shut-off and boil-dry protection for safety.
- Look for wide, rounded interiors and removable lids for easy cleaning and weekly descaling to avoid residue and odors.
Why Heating Milk in a Kettle Requires Special Features
Why does milk scorch in a regular kettle when water doesn’t? You’re dealing with proteins and sugars that react differently than pure water. Milk contains lactose and casein; as temperature rises, proteins denature and form films that adhere to hot metal and concentrate heat at contact points. Sugars caramelize, darkening and producing burnt odors before the bulk reaches a rolling boil. Unlike water, milk’s viscosity and fat content reduce convection, so heat isn’t distributed evenly; you’ll feel localized hot spots and hear a different simmering sound. That combination accelerates Maillard reactions at the surface and on the heating element, increasing the risk of scorching and stubborn residue. For safety, you’ll want controls that prevent sudden boiling-over and materials that limit sticking and overheating. Being aware of these physical and chemical behaviors helps you avoid burnt milk, smoky fumes, and difficult clean-up while protecting surfaces and reducing fire risk. Some kettles even include descaling maintenance to preserve efficiency and prevent residue buildup.
Key Features to Look for When Choosing a Milk-Safe Electric Kettle
How do you pick a kettle that’ll handle milk without scorching? You want a model designed for viscous liquids: look for smooth, heat-resistant interiors, sturdy seals, and a wide base that spreads heat evenly so milk won’t cling and burn. Prioritize features that reduce boil-over and make cleaning safe and simple.
- Non-reactive interior (stainless steel or enamel) to prevent flavor transfer and staining.
- Flat, wide heating surface to distribute heat and minimize hotspots.
- Clear overfill/boil-over guard and secure lid to contain foam and steam.
- Easy-to-clean design with rounded corners and removable components to eliminate residue.
- Stable base with safety cut-off and cool-touch exterior to prevent scalds.
These elements lessen scorching risk, improve sensory outcomes (smooth texture, clean aroma), and keep maintenance simple. Choose models with documented performance for milk or thick liquids, and always follow manufacturer safety guidance. Consider kettles with stainless steel bodies for durability and ease of cleaning.
Temperature Control: Settings That Prevent Scorching
After choosing a kettle built to handle milk, you’ll need precise temperature control to keep milk from scorching and foaming over. You want repeatable settings: a digital thermostat with at least 1–2°C increments lets you stop heating before proteins denature (around 72–75°C for scalding prevention). Look for hold functions that maintain a steady temperature without cycling wildly; frequent on/off cycles create hot spots that cause a burnt smell and skin formation. A graduated display and tactile controls reduce mistakes when you’re distracted. Prefer models with automatic shutoff tied to actual liquid temperature rather than simple boil-dry sensors; that prevents overshoot if milk splashes. Audible alerts are useful, but adjustable volume keeps you from missing soft sounds while avoiding startling noises. Finally, verify manufacturer temperature-accuracy claims with independent reviews—consistent performance is the safety factor that preserves flavor and prevents hazardous boilovers. Also remember to prioritize kettles with automatic shut-off and overheat protection to reduce fire and electrical risks on trains and other shared spaces.
Heating Elements and Materials: Which Are Best for Milk
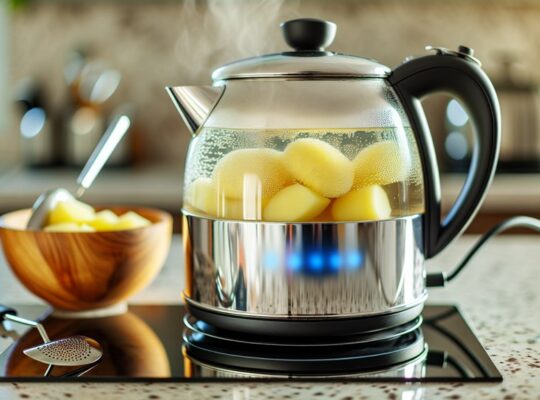
When you’re heating milk, the kettle’s element and interior material matter as much as the thermostat: they determine heat distribution, reaction with milk proteins, and how easy it is to clean residue before it chars. You’ll want materials that give even, gentle heat and resist sticking or chemical reaction. Stainless steel and concealed flat heating elements are best for predictable conduction and safe cleaning; exposed coil elements create hot spots that encourage scorching. Nonstick coatings can help, but they may degrade with high temperatures and scratches. Glass lets you observe scalding but transfers heat faster near the base, so watch closely. Ceramic-lined kettles offer gentle warming and neutral chemistry but can be brittle.
- Stainless steel body with concealed element: even heat, easy cleaning
- Glass with clear visibility: monitor scum, but expect faster base heating
- Ceramic lining: gentle, inert, but fragile
- Avoid exposed coil elements: promote hot spots and burns
- Skip degraded nonstick finishes: risk flaking and reduced safety
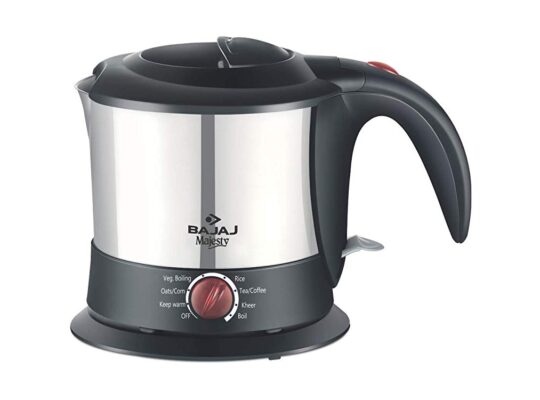
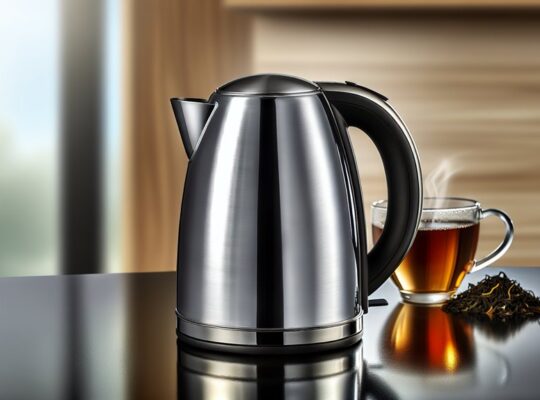
The iBELL SEK20BM is a 2-litre stainless steel kettle with a powerful 1500W element that is well-suited for heating milk and family use, offering rapid boiling and convenient handling.
Size and Capacity Considerations for Milk Preparation
Think about how much milk you typically heat: a 0.5–1.0 L kettle is ideal for single servings and latte-style frothing, while 1.5–2.0 L suits families or batch cooking. You’ll want headroom—leave at least 20–30% free volume to prevent boil‑overs and allow steam and froth to form without scorching. Choose capacity based on portion frequency and the sensory need for foam, since too-small kettles force repeated heats and too-large ones waste energy and increase surface contact that can encourage burning. Also consider kettles with auto shut off and dry boil protection for safer milk heating and to reduce the risk of burning.
Ideal Kettle Capacity
Capacity matters more for milk than for water: choose a kettle size that matches how much milk you’ll heat most often, because overheating a near-empty vessel wastes energy and increases scalding risk, while too-large kettles make temperature control sluggish. You want a kettle that gives predictable heat-up times and even temperature distribution so milk doesn’t cling, brown, or form a skin. Measure typical servings and allow a small headroom (10–20%) to prevent boil-overs. Prefer models with clear capacity markings and gentle simmer or temperature presets for milk.
- Match capacity to usual batch size; avoid repeatedly heating tiny amounts.
- Choose visible, accurate fill lines for safe dosing.
- Aim for a 10–20% headspace margin.
- Favor models with low thermal mass for responsive control.
- Ensure easy-to-clean interiors to remove residue.
Single-Serve Vs Family
How much milk are you really heating at a time, and how does that change what kettle you should pick? If you’re making one cup, a single‑serve kettle (0.5–0.8 L) gives rapid, even warming with less surface contact, reducing scorch risk and energy use. For multiple cups or family use, a 1.5–2.0 L model prevents repeated heating cycles, but larger volumes increase time and the area of contact where milk can cling and burn. Choose stainless steel interiors with rounded bases for uniform heat transfer and avoid exposed heating elements that trap residue. Look for clear capacity markings so you won’t overfill; leaving appropriate headspace prevents boil‑over. Prioritize models with reliable temperature control and safety cutoffs to protect both milk quality and your kitchen.
Headspace for Frothing
Why leave extra room when you’re heating milk for frothing? You’ll avoid boil-overs, ensure proper steam expansion, and give bubbles space to form without splattering. Heat causes milk to expand; a safe headspace keeps you from burns and messy cleanups.
- Reserve about 25–30% of vessel volume as headspace to accommodate foaming.
- For steam wand frothing, use a jug at least twice the milk volume you’ll heat.
- When using an electric kettle with temperature control, don’t fill past marked safe fill lines.
- Cooler metal jugs transfer heat quickly—watch for rapid rise and stop before spilling.
- If you’re prepping multiple drinks, heat in batches to maintain consistent foam and prevent overheating.
These measures are evidence-aligned and protect both texture and safety.
Cleaning and Maintenance to Avoid Residue and Burnt Smells
To keep milk from leaving sticky film and lingering smells, you’ll need a routine that prevents residue, uses periodic descaling, and targets odors. Wiping the interior after each use, running a vinegar or citric acid descaling cycle weekly, and airing the kettle will reduce buildup and the burnt, sour scent you can otherwise detect. If persistent smells remain, a baking soda paste or a few tablespoons in warm water neutralizes odors without harming most stainless interiors. Regular descaling at least once a month helps prevent limescale from contaminating beverages and reducing heating efficiency, and using distilled water can further reduce mineral buildup.
Preventing Milk Residue
Want to stop milk residue and burnt smells before they form? You can prevent stubborn film and smoky odors by controlling temperature, timing, and hygiene. Heat milk gently — avoid full rolling boil — and remove it at first signs of simmering; protein denaturation and Maillard reactions accelerate at high heat and create brown residues and off-odors. Rinse immediately after pouring to prevent thin skin formation that bakes on as it cools. Use a soft, non-abrasive cloth to wipe the interior while warm; abrasive pads can roughen surfaces and trap particles. Store the kettle lid open to let steam escape and inhibit microbial growth.
- Monitor temperature; stop at 70–80°C for many milk drinks
- Pour promptly; don’t let milk sit
- Rinse warm, not cold
- Wipe with soft cloth
- Air-dry with lid ajar
Descaling and Deep Cleaning
A regular descaling and deep-cleaning routine keeps mineral build-up and milk residues from accumulating and creating bitter, burnt smells; you’ll notice deposits as chalky rings, cloudy water, or a dulled heating element. Empty the kettle, then fill it with a 1:1 white vinegar–water solution or a citric acid mix (1–2 tablespoons per liter). Boil gently, let sit 20–30 minutes, then rinse thoroughly until the vinegar smell is gone. For stubborn milk film, scrub interior with a soft brush or non-abrasive pad and a baking soda paste; avoid steel wool that scratches protective coatings. Dry completely with a clean cloth to prevent bacterial growth. Descale monthly in hard water areas, and always follow manufacturer safety instructions to protect heating elements and seals.
Odor Removal Techniques
Descaling and scrubbing remove much of the buildup, but lingering odors from scorched milk or mineral deposits can persist and affect future batches — here’s how to eliminate them effectively. You’ll want to act promptly and use safe, food-grade agents to neutralize smells without harming the kettle lining. Rinse thoroughly after each treatment and dry to prevent bacterial growth.
- Fill with equal parts water and white vinegar, boil, let sit 30 minutes, then rinse twice.
- Boil water with a tablespoon of baking soda, cool, discard, and ventilate the kettle.
- Use a lemon slice or citric acid solution, boil briefly, then air-dry to leave a fresh scent.
- Wipe seal and spout with isopropyl wipe (food-safe) and dry.
- Store open and upright to avoid trapped odors.
Top Safety Features for Boiling Milk in an Electric Kettle
Many kettles now include multiple built-in safeguards that’ll keep milk from scorching, overflowing, or creating a hazardous mess. You’ll want automatic shut-off triggered by temperature sensors so the element cuts power the moment milk reaches set heat; this prevents localized burning and the burnt-milk smell. Look for boil-dry protection that senses low liquid and stops heating — the sensor reacts faster with milk’s higher viscosity than water. A wide, sealed lid with a secure latch reduces steam spitting and greasy splatter, protecting hands and surfaces. Anti-overflow or foam-detection systems monitor rising bubbles and pause heating before milk spills. Insulated exteriors and cool-touch handles keep you safe when pouring; tactile feedback from a firm handle reduces slips. Removable, dishwasher-safe filters and smooth interior coatings minimize residue build-up that can hide hotspots. Verify safety certifications (UL, CE) and user-tested controls; documented standards ensure the features you rely on have been independently validated. Regular descaling every 1-3 months helps prevent mineral buildup that can lengthen boiling times and create hotspots.
Best Electric Kettle Types for Different Milk Uses (Latte, Baby Formula, Hot Chocolate)
When you’re choosing a kettle for latte steaming, baby formula, or hot chocolate, precise temperature control matters because even a few degrees changes milk texture and nutrient retention. You’ll also want a nonstick or smooth inner coating to prevent scorching and make sensory inspection and cleaning straightforward. Finally, a narrow, well-shaped spout gives controlled flow for pouring microfoam or precise formula prep without splashes. An adjustable temperature setting is especially helpful for recipes and uses that require specific heat levels, such as baby bottle warming.
Temperature Control Precision
How precise do you need your kettle’s temperature control depends on what you’re heating: milk for a latte, baby formula, or hot chocolate all have different safe and sensory targets. You’ll want a kettle that hits and holds specific temperatures — ±1–2°C precision is ideal — so flavor and safety aren’t compromised. For lattes, aim for 55–65°C to preserve sweetness and microfoam. For baby formula, follow manufacturer guidance (usually ~37°C) and avoid hotspots by stirring and measuring. For hot chocolate, slightly higher temps (60–70°C) extract cocoa without scalding. Choose models with digital controls, accurate thermostats, and reliable hold functions.
- Digital setpoints with ±1–2°C accuracy
- Hold/warm function for stable serving
- Fast, even heating to avoid hotspots
- Clear, repeatable temperature readout
- Safety cutoffs and cool-touch indicators
Nonstick/Inner-Surface Coating
Why does the kettle’s inner surface matter as much as its thermostat? Because coating type directly affects heat transfer, sticking, and residue that can scald milk or harbor bacteria. You’ll prefer a true nonstick (PTFE-free ceramic or hard-anodized) for easy cleaning and reduced film formation; studies show smoother surfaces limit protein adhesion, lowering burnt-on flavor and hotspots. Stainless steel with a polished finish is also safe, durable, and resists pitting from milk’s lactose and minerals, though it may need more attentive stirring. Avoid chipped enamel or degraded coatings — flakes and exposed metal raise contamination risk. Always inspect coating integrity before use, clean promptly with gentle detergents, and replace kettles if surface damage appears to maintain safety and consistent milk heating.
Spout Design and Flow
Which spout shape and flow rate will give you the control you need for different milk drinks? You want a spout that lets you direct a steady, predictable stream without splatter so milk heats evenly and you avoid scalding or burns. Narrow gooseneck spouts excel for lattes—precise thin streams for latte art and slow pour control. Wider straight spouts suit baby formula and hot chocolate where faster, splash-free filling matters. Look for models with smooth, chamfered edges and consistent flow at low boil to minimize surface agitation and skin formation. Prioritize safety features like drip-catching lips and cool-touch handles. Test pour speeds and watch for turbulent flow; evidence shows controlled laminar flow reduces heat spots and improves thermal safety.
- Gooseneck: precise, slow
- Straight wide: fast, splash-free
- Chamfered edge: smooth stream
- Drip lip: cleaner safety
- Cool-touch handle: burn prevention
Budget Vs Premium Models: Which Offers Better Milk Performance
Curious whether a high-end kettle really makes a measurable difference when you’re heating milk? You’ll find differences, but they’re specific. Premium models often have tighter temperature control (±1–2°C), smoother stainless interiors, and thicker bases that distribute heat more evenly; that reduces scorching risk and gives a creamier mouthfeel. Budget kettles can be fine if they offer tempered glass or food-grade stainless and simple thermostats, but they typically show wider temperature swings and thinner walls that transmit heat faster to the milk’s surface—sensory cues you’ll notice as faint scorching aroma or quicker skin formation.
For safety-minded users, premium units tend to include reliable auto-shutoff and overheat protection calibrated to low-temp settings, lowering burn and boil-over hazards. Still, a midrange kettle with documented temp stability and safe materials can perform adequately; prioritize verified temperature accuracy and certified materials over price alone to protect flavor and prevent dangerous overheating. Glass kettles are corrosion-resistant and make it easy to spot build-up, which helps maintain milk flavor and hygiene.
Tips and Techniques for Heating Milk Without Burning
How can you heat milk in an electric kettle without scorching it? You’ll want controlled, gentle heat and constant attention to prevent protein and lactose from sticking and burning. Use a thermometer or kettles with low-temperature settings to aim for 60–70°C (140–158°F) for warm milk, 80–85°C (176–185°F) just below simmer. Heat slowly, stir or swirl frequently to distribute heat and break the surface skin. Stay nearby — milk foams and climbs quickly once it nears boiling.
- Use a low-power or temperature-control setting and pre-warm the kettle with a little water.
- Pour milk into a stainless steel or non-stick-lined kettle; avoid thin-bottomed vessels.
- Stir every 15–30 seconds with a heat-resistant utensil to prevent hotspots.
- Monitor with an instant-read thermometer and remove at target temperature.
- If scalding occurs, soak the kettle immediately in warm soapy water to prevent residue and odor.
Selecting the right material, such as stainless steel, and following proper maintenance will help preserve kettle performance and reduce energy waste.
Frequently Asked Questions
Can I Steam Froth Milk Directly in an Electric Kettle?
No — you can’t properly steam-froth milk directly in a standard electric kettle; it lacks pressure/temperature control and steam wand, risking scalding, scorching, and damage. Use a dedicated milk frother or steam wand for safe, consistent results.
Will Milk Residue Affect Kettle Warranty or Service?
Yes — milk residue can void warranty or service if manufacturers specify misuse or contamination; you’ll likely smell scorched milk, see discoloration, and face clogged elements. Clean thoroughly and follow care instructions to preserve coverage.
Can I Use Plant-Based Milks in the Same Kettle as Dairy?
Yes — you can use plant-based milks in the same kettle as dairy, but rinse thoroughly after each use. They’ll leave different residues and odors; clean with hot water and gentle detergent, avoiding abrasive scrubs to protect surfaces.
How Long Does Descaling Extend Milk-Safe Kettle Life?
Regular descaling can extend a milk-safe kettle’s life by 1–3 years on average; it prevents scale buildup that traps heat, reduces scorching, and preserves seals and sensors, so you’ll have safer, more reliable performance longer.
Are There Kettles Suitable for Reheating Already Boiled Milk?
Yes — you can reheat already boiled milk in kettles designed for low-temperature control or with a keep-warm function. Choose stainless steel, easy-clean surfaces, gentle heat settings, and monitor texture to prevent scalding or off-flavors.