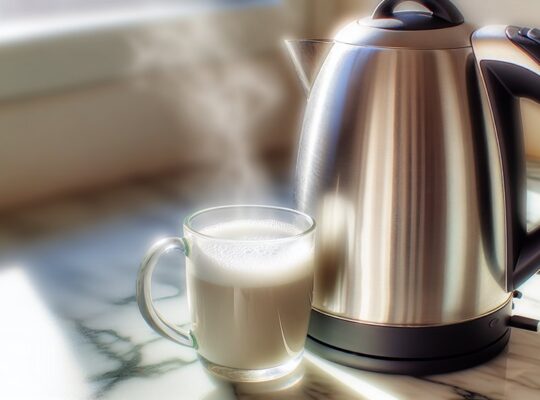
You can make a clean, flavorful cup with just a kettle, good beans and a few simple tools. Feel the heat in the spout as you pour; smell the grounds bloom; watch the color turn as extraction begins. Focus on grind size, water temperature and steady pours to control bitterness and body. If you want a reliable method that fits a small kitchen or a travel bag, keep going — the steps are straightforward and worth mastering.
Key Takeaways
- Boil water in a kettle, then let it rest 30–60 seconds to reach 90–96°C ideal brewing temperature.
- Use freshly ground coffee (medium-coarse for steep, medium for pour-over) and a 1:15–1:18 coffee-to-water ratio.
- For pour-over: place a rinsed paper filter in a cone, add grounds, bloom with a small pour for 30–45 seconds, then pour slowly in concentric circles.
- For steep-and-strain or cowboy method: stir grounds into hot water, steep 3–4 minutes, then pour slowly through a fine mesh or cloth-lined sieve.
- Preheat your mug/carafe and rinse filters; handle the hot kettle carefully with mitts to avoid scalding.
Why a Kettle Is All You Really Need for Great Coffee
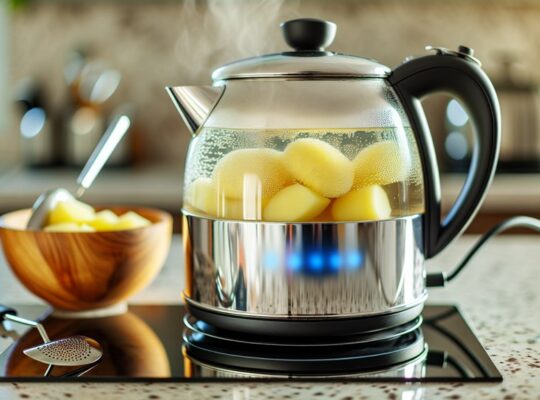
Why does a simple kettle release great coffee? You’ll notice immediacy: boiling water carries heat uniformly, unlo cking oils and aromas when it meets ground beans. You’ll control temperature by lifting the kettle off heat, letting it rest 30–60 seconds to reach an ideal extraction range; that pause preserves flavor without scalding. Pouring technique matters — steady concentric circles or slow center pours saturate grounds evenly, avoiding channeling and bitterness. You’ll use sight and sound: a light bloom, tiny bubbles rising, tells you degassing is occurring; silence after pour signals contact is complete. The kettle’s spout gives you precision; a narrow tip lets you modulate flow rate and agitation to suit grind size. You’ll stay safe: handle a hot kettle with a dry cloth, keep steam away from skin, and place it on a stable surface. With focused technique and respect for heat, a kettle delivers consistent, clean coffee without complex gear. For quick kitchen multitasking, you can also boil eggs in the kettle while heating water for coffee, timing them for soft-boiled results.
What You’ll Need: Tools and Ingredients Checklist
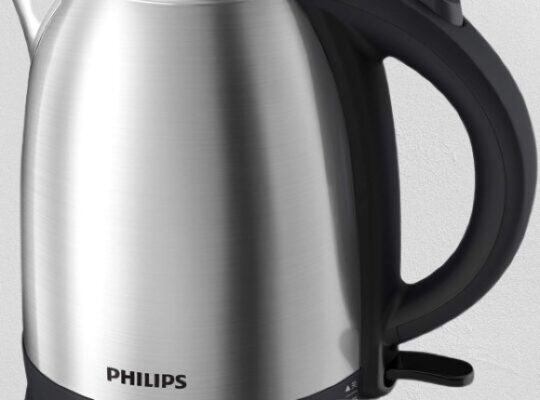
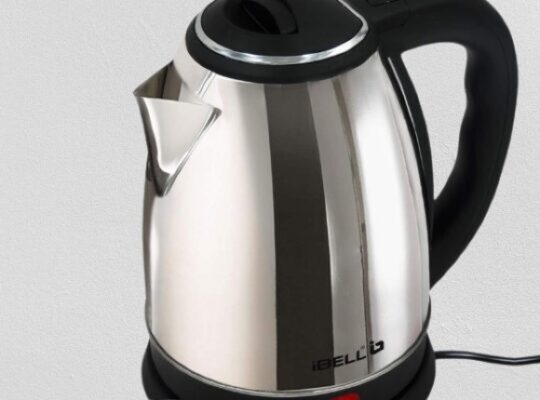
Now that you know how a kettle gives you control over heat and pour, here’s what you’ll need to put that control to work. A kettle with a narrow spout (gooseneck preferred) for steady, accurate pours; check the lid fits snugly and the handle stays cool. Fresh coffee beans and a grinder are essential — you’ll want consistent particle size, but we’ll cover specifics later. A reliable scale (0.1 g resolution) ensures repeatable brew ratios. A thermometer or a kettle with temperature markings helps you hit the target water range safely. Use a heatproof carafe or mug and a filter system: paper filters for clarity or a metal filter for body. Have a stirring utensil (long spoon) and a timer. Keep a clean towel and oven mitts close to handle hot surfaces. Finally, use fresh, cold water and measure both beans and water precisely. Inspect equipment for damage before use to prevent scalding or spills. Before traveling with your kettle, remember to check airline and security regulations so you pack appropriately.
Understanding Grind Sizes and Their Uses
You’ll feel the difference between coarse, sandy grounds and fine, flour-like dust when you grind — coarse extracts slowly and tastes cleaner, while fine extracts quickly and can taste bitter. Grind size controls contact time and surface area, so match a coarse grind to a steep or immersion method and a finer grind to quick, high-pressure or pour-over techniques. Adjust grind in small steps and smell and taste each change to lock in the texture and flavor you want. Choose a grinder that provides consistent particle sizes and temperature control to prevent overheating during grinding.
Coarse vs. Fine
Curious how grind size changes the taste and extraction? You’ll notice coarse grounds look like sea salt and release flavors slowly; they produce cleaner, brighter cups with less bitterness when steeped longer. Fine grounds resemble table salt or powdered sugar, extracting quickly and yielding fuller body but risking over-extraction and harshness if water contact is prolonged. When you’re brewing with a kettle and improvised filter, use coarse for immersion methods and longer contact, and fine for quick pour-over through a tight filter. Always handle hot water carefully: control pour speed and keep hands clear of steam. Measure grounds consistently, rinse paper filters to avoid papery flavors, and adjust grind one step at a time until balance, clarity, and safety are achieved.
Grind Size Effects
Because grind size controls surface area and flow, it directly shapes extraction, flavor clarity, and mouthfeel when you brew without a machine. Choose coarser grinds for gentler extraction: the water contacts fewer particles, producing cleaner, less bitter cups with textured body. Finer grinds increase surface area, speeding extraction and intensifying acidity, sweetness, and potential bitterness—use restraint to avoid overextraction. Visually inspect grounds: coarse resemble sea salt, medium like sand, fine like table salt. Adjust dose and steep time rather than risking scalds; longer steep with coarse, shorter with fine. Stir gently to equalize saturation and prevent dry pockets. When pouring from a kettle, pour steadily to control contact time. Store grinds airtight and grind just before brewing for consistent, safe results.
Matching Grind Methods
Knowing how grind size changes extraction is only half the story — you also need to match that size to a method that will control contact time and flow. If you grind coarse, choose immersion techniques like a French press or steep-and-pour in a heatproof jar; the larger particles slow extraction, so you’ll steep 3–4 minutes and use a sturdy filter or decant carefully to avoid sediment. For medium-coarse, use a pour-over with a paper filter to balance flow and clarity; pour steadily to keep temperature stable. Fine grinds suit Moka-pot style stovetop or a metal filter pour-over with short contact to prevent over-extraction. Always preheat your vessel, rinse filters, and handle hot water with tongs or mitts to prevent burns.
Perfect Water Temperature and How to Achieve It
Aim for 195–205°F (90–96°C) when brewing to extract sugars and aromatics without burning fragile acids. Use a thermometer or watch the kettle: small steady bubbles and a faint whistle are about right, while a rolling boil needs 30–60 seconds off heat to cool. For light roasts nudge toward the higher end for brightness, and for dark roasts cool slightly to tame bitterness. Regular descaling helps maintain accurate temperatures by preventing limescale buildup.
Ideal Brewing Temperature
How hot should your water be for the cleanest, most balanced extraction? Aim for 195–205°F (90–96°C); that range unlocks oils and acids without scalding, giving bright aroma and smooth body. You’ll hear a soft hiss and smell floral notes as you pour; that’s the cue.
| Coffee Style | Target Temp |
|---|---|
| Light roast | 200–205°F |
| Medium roast | 195–205°F |
| Dark roast | 190–195°F |
To achieve this, heat until just off boil, let sit 30–45 seconds, then pour steadily. Use a kettle with a spout for control, keep fingers away from steam, and pour over grounds in a slow, concentric motion. Safety-first: handle hot water deliberately.
How to Measure Heat
You’ve got the target temps in mind, now pinning them accurately is the next step. Use a digital thermometer probe for direct readings: insert it into the water just below the surface, avoid touching the kettle sides, and hold steady until the display stabilizes. If you don’t have a probe, watch for visual cues—small bubbles at 175–185°F (80–85°C), larger bubbles and steam at 195–205°F (90–96°C)—and time your boil: off-boil for ~30 seconds equals ~200°F depending on altitude. Cool measured water by transferring to a ceramic or glass container; metal retains heat. Always handle hot vessels with a towel or mitt, keep hands clear of steam, and verify temperature twice before pouring to protect skin and preserve flavor.
Adjusting for Roast Level
Wondering how roast changes the water you should use? Lighter roasts need hotter water—about 93–96°C—to coax bright acidity and floral aromatics; darker roasts prefer 90–93°C to avoid bitter over‑extraction and burnt caramel notes. Use a kettle with a thermometer or let boiling water sit: 30 seconds for ~95°C, 45–60 seconds for ~92°C, 90 seconds for ~88–90°C depending on volume and ambient temperature. Taste as you go: if the cup screams acidic, lower temp 1–2°C; if it’s flat or bitter, raise temp slightly. Always pour carefully to avoid scalding; handle hot metal and steam with oven mitts or a towel. Record your temperatures and results so you can repeat safe, consistent brews.
Pour-Over Method Using a Kettle and Simple Filter
Want a clean, bright cup with control over every variable? Set a kettle to just off-boil (about 200°F/93°C). Position a simple cone filter over a mug or small carafe; rinse the filter with hot water to remove paper taste and preheat the vessel. Weigh 15–18 g of medium-fine coffee for every 250 ml water; grind fresh to a texture like granulated sugar.
Place grounds in the damp filter, level them, then start a 30–45 second bloom with 40–50 ml water, pouring gently to wet all grounds. After gases escape, pour in steady concentric circles, reaching total pour by 2:30–3:00 minutes. Aim for an even, thin stream to avoid channeling; pause if grounds rise too high. When dripping slows, remove filter and discard grounds safely—it’s hot. Taste; adjust grind finer for faster extraction or coarser to slow it. Clean equipment after cooling to maintain safety and flavor. Make sure to descale the kettle regularly to prevent limescale buildup and preserve heating efficiency descaling.
Steep-and-Strain Method for a Smooth, No-Fuss Brew
How long should you let coffee steep to get a clean, round cup? Aim for 3½ to 4 minutes with medium-coarse grounds; that gives balanced extraction without overbitter notes. Measure 1 heaping tablespoon per 6 ounces of water, heat water to 200°F (just off boil), then pour evenly over grounds in a heatproof vessel. Stir gently to saturate and watch the surface bloom — tiny bubbles and nutty aromas indicate active degassing. Cover to retain heat, then set a timer. When 3½–4 minutes pass, press a flat spoon against the grounds and pour slowly through a fine mesh sieve lined with a paper towel or clean kitchen cloth to catch fines. Rinse the cloth first to avoid papery flavors. Pour into a prewarmed cup and inhale: you should notice sweet caramel and mild citrus brightness, not ash or grit. Dispose of grounds safely; scalding liquid can burn, so handle hot vessels with care. For consistent results over multiple brews, consider using an electric kettle with temperature control for precise heating temperature control.
Cowboy Coffee: Quick Rustic Brewing Technique
You’ll bring water to a rolling boil, stir in coarse grounds, then pull the kettle off heat to let the coffee steep for a minute or two. Watch for the aroma to bloom and the surface to calm, then tap the side of the pot gently and wait for the grounds to settle to the bottom. Pour slowly and steadily so the settled grounds stay put and you get a bold, gritty cup with minimal sediment. An electric kettle can speed up the process by heating water quickly and allowing for precise temperature control.
Boil-And-Steep Method
Ever tried making coffee over an open flame? You’ll use the boil-and-steep method: heat water to a rolling boil, remove from heat, then add grounds and steep. Watch steam and listen for the hiss; that’s your cue to be cautious and steady.
- Measure 1 heaping tablespoon coarsely ground coffee per 6 ounces water; pour boiling water over grounds.
- Stir gently, cover the kettle, and let steep 4 minutes—aroma will bloom, oils releasing a syrupy sweetness.
- After 4 minutes, cool 30–45 seconds to let agitation settle, then pour slowly through a fine mesh or pour over a filter.
Keep handles secure, use heatproof gloves if needed, and avoid sloshing hot liquid.
Settling Grounds Technique
If the boil-and-steep method gave you a bold, full-bodied cup but left a layer of sediment, the settling grounds technique (often called cowboy coffee) lets you get similar intensity with less grit. You heat water to a rolling boil, remove from heat, and add coarsely ground coffee—about one heaping tablespoon per 6 ounces. Stir once, cover, and let steep for 4 minutes; the grounds swell and release rich, aromatic oils. After steeping, wait 2–3 minutes: grounds will settle to the bottom. Pour slowly and steadily, keeping the spout elevated to avoid disturbing the bed. If you want extra clarity, tilt the kettle and stop before the last sip. Always handle the hot kettle with a dry, steady grip for safety.
French Press Style With a Jar or Heatproof Container
A Mason jar or any heatproof glass becomes your improvised French press: add coarsely ground coffee, pour just-off-boil water to bloom the grounds, stir to fully saturate, then secure a lid or plate and let it steep 3–4 minutes before pressing down slowly with a spoon or makeshift plunger (a smaller jar inverted inside works well). You’ll notice the surface swell and release a nutty, floral aroma; use a wooden or heat-resistant spoon to avoid cracking glass. After steeping, press gently to push grounds to the bottom, keeping motion steady to prevent splashing. Let the jar sit a minute to let sediments settle, then pour through a fine sieve or cheesecloth into your cup to minimize grit. Clean carefully while still warm to avoid stuck residue. For consistent results, use a kettle with a concelaled heating element to ensure even heating and quick boil times.
- Use a coarse grind and a 1:15 coffee-to-water ratio for clarity.
- Pour water off the boil (about 93–96°C) to protect flavor and glass.
- Press slowly, keep hands stable and use oven mitts if needed.
Tips to Avoid Bitterness, Over-Extraction, and Grit
How do you keep your jar brew from turning harsh, chalky, or full of grit? Start with the grind: use a coarse, even grind so particles settle quickly and don’t over-extract. Measure coffee-to-water precisely—generally 1:15–1:17 by weight—so you’re not brewing too strong. Pour water just off-boil (about 92–96°C / 195–205°F) to avoid scorching the grounds, and pour gently to saturate evenly; aggressive agitation speeds extraction and bitterness.
Time the steep: 3½–4 minutes for coarse grinds; longer pulls out bitter compounds. When plunging with a makeshift filter (a fine mesh or cloth over the jar mouth), press slowly and steadily to minimize suspended fines. If you don’t have a filter, let the jar sit 2–3 minutes after stirring for fines to settle, then decant with a ladle, leaving the sediment. Rinse and handle hot glass with care—use a towel or heat-resistant gloves to prevent burns. For quick heating in a hostel or small room, consider using a compact electric kettle like a 1-litre model for fast boiling and easy handling 1-litre capacity.
Flavor Tweaks and Serving Suggestions
Now that you’ve locked down grind, water temp, and timing to prevent harshness and grit, small adjustments will let you tune the cup toward brightness, sweetness, or body. Taste first, then act: sniff for acidity, sip for mouthfeel, feel residual heat to judge extraction. If you want brightness, add 5–10% cooler water in the final bloom; acidity will pop and clarity improve. For sweetness, extend contact by 10–15 seconds with the same water temp to coax sugars, watching for bitter edges. To increase body, stir gently to suspend fines, then let a slightly longer settle before pouring.
- Adjust final pour temperature: cooler for brightness, warmer for body.
- Modify contact time: shorter for clean acidity, longer for sweetness.
- Use small additive tweaks: pinch of salt to round bitterness, splash of hot milk for texture.
Always handle the kettle and hot cup carefully; use a stable surface and oven mitts if needed to prevent burns. An electric kettle’s heating element quickly converts electricity into heat, so unplug or switch it off before cleaning.
Frequently Asked Questions
Can You Make Iced Coffee Using These Kettle Methods?
Yes — you can. Brew slightly stronger hot coffee, cool it briefly to avoid steam burns, pour over ice in a sturdy glass, stir to chill, adjust sweetness and milk, and serve immediately or refrigerate safely.
How to Scale Recipes for Larger Groups?
Multiply beans and water by guest count, keeping the 1:15–1:17 ratio; grind slightly coarser for larger batches, steep longer, and pour gently to avoid grounds. Taste, adjust strength, and cool safely before serving.
Are There Safety Tips for Boiling Water on a Gas Stove?
Yes — keep flammable items away, use proper pot size, watch the flame height, grip handles with mitts, vent the room, never leave boiling water unattended, turn off the gas promptly, and ensure good lighting and steady footing.
Can I Use Flavored or Instant Coffee With These Methods?
Yes — you can use flavored or instant coffee. Instant dissolves fast; flavored grounds add aroma and strength. Measure carefully, steep or stir thoroughly, strain when needed, and keep hot surfaces and steam-handling practices safe throughout.
How to Store Leftover Brewed Coffee Safely?
Store leftover brewed coffee in a clean, airtight container while still warm to minimize bacteria; cool quickly in an ice bath, refrigerate within two hours, and consume within 24–48 hours for best safety and flavor.