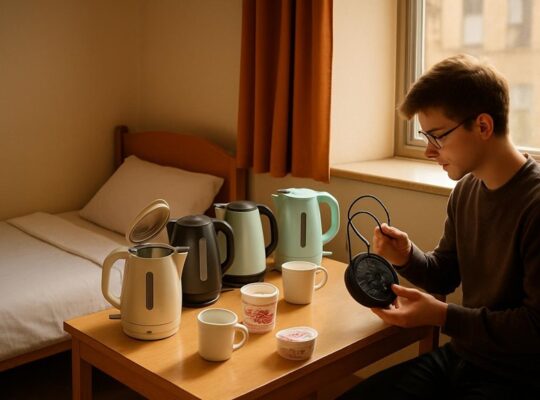
If your electric kettle won’t heat, you’ll want a quick, practical way to find the cause and fix it. Start by confirming power and checking the plug and outlet. From there, you’ll methodically rule out a tripped thermal cut-out, a faulty element, loose wiring, or mineral buildup. Follow a few safe tests and simple repairs, and you’ll know whether it’s an easy fix or time to replace or call a pro.
Key Takeaways
- Check the power source: verify the outlet works and test the kettle in a different socket.
- Inspect plug and cord for burns, cuts, loose connection, or a blown removable fuse.
- Test heating element and internal continuity with a multimeter; replace if open or out-of-spec.
- Descale limescale buildup (equal parts water and white vinegar, boil, soak 30–60 minutes) and rinse.
- Inspect thermostat, thermal cut-out, and switches for faults; seek professional repair for sealed-element or high-voltage issues.
Common Causes Why an Electric Kettle Won’t Heat
Why isn’t your kettle heating up? Start by ruling out simple, safe causes. The heating element can be coated with limescale; heavy buildup reduces contact and heating efficiency. If your kettle has a visible element, inspect and descale following manufacturer guidance; for sealed elements, look for performance decline. A tripped thermal cutoff or faulty thermostat can prevent activation; these are safety features, so don’t bypass them. Faulty internal wiring or a loose connection at the element or switch may interrupt power flow; only a qualified technician should open the unit. Some kettles have a dry-boil sensor that prevents heating when there’s insufficient water—always check water level markings before switching on. If the on/off switch is worn or the indicator light fails, the control may be defective. Finally, corrosion or moisture damage inside the base can break circuits. Note any burnt smells, smoke, or sparks—if present, unplug immediately and seek professional repair or replace the kettle. Regular descaling every 1–3 months helps prevent mineral buildup and maintain performance.
How to Check the Power Supply and Plug
First check the outlet by plugging in a lamp or phone charger to confirm it has power. Inspect the kettle’s plug and cord for damage, loose connections, or bent prongs that could interrupt the supply. If everything looks fine, test the kettle in a different socket to rule out a faulty outlet. Also consider the kettle’s safety features like boil dry protection, which can prevent heating if triggered.
Inspect the Power Outlet
Wondering if the problem’s external to the kettle? Start by confirming the outlet has power: plug in a lamp or phone charger you know works. If that device doesn’t power up, try another outlet on the same circuit. Check for tripped breakers or a blown fuse at the panel and reset only if you know how—turn power off first if you must inspect wiring. Look for visible damage to the outlet face, discoloration, buzzing, or a loose socket; these signs suggest a hazardous fault—don’t use the outlet. If the outlet is controlled by a wall switch, confirm the switch is on. For any outlet that shows heat damage, flickering, or uncertain wiring, stop and call a qualified electrician. Safety first: don’t attempt internal outlet repairs yourself.
Examine the Plug and Cord
How does the kettle get power from the plug and cord? Start by unplugging before you touch anything. Visually inspect the plug for burn marks, melted plastic, bent pins or loose prongs. Run your fingers along the cord to feel for stiffness, kinks, soft spots or cuts; don’t use the kettle if the insulation is damaged. Check that the cord is firmly seated into the kettle base or appliance body—wobble indicates a bad connection. If the plug has a removable fuse (UK-style), switch off power, remove it, and verify the fuse isn’t blown; replace with the correct rating if needed. Do not attempt internal repairs unless you’re qualified. If you find damage or a blown fuse, stop and replace the cord or seek professional service.
Test With a Different Socket
Want to rule out the wall socket or circuit as the problem? Unplug the kettle, move it to a different outlet—preferably on a different circuit—and plug it in. Use an outlet you know works (lamp or phone charger test). Don’t force plugs or use loose adapters. If the kettle heats normally in the new socket, the original outlet or circuit likely has a fault; check the breaker and reset it, and avoid using the outlet until it’s inspected. If it still won’t heat, the issue is inside the kettle. If the substitute outlet is a GFCI or switched socket, test resetting it first. If you’re unsure about electrical wiring or breakers, stop and call a qualified electrician to prevent shock or fire risk.
Inspecting the On/Off Switch and Indicator Light
Where should you start when a kettle won’t heat? Begin by checking the on/off switch and the indicator light—these are simple, visible clues. With the kettle unplugged, inspect the switch for physical damage, debris, or sticky movement. If it feels loose, jammed, or doesn’t click cleanly, don’t force it; that can cause electrical faults.
Plug the kettle into a known-good socket and observe the indicator light when you switch it on. A steady or flashing light usually shows power is reaching the appliance; no light suggests a switch failure, cord issue, or internal disconnection. If the light is dim or intermittent, note the behavior—this helps diagnosis.
Never open sealed components unless you’re qualified. If the switch doesn’t operate properly or the light never comes on despite a working outlet, stop and either have a trained technician inspect internal wiring or replace the kettle to avoid shock or fire risk.
Place the kettle on a stable, heat-resistant surface away from edges and heat sources before testing to ensure safe operation.
Testing for a Tripped Thermal Cut-Out or Fuse
Next, you’ll check the thermal cut-out and internal fuse, which are common safety components that stop heating if something’s wrong. First locate the thermal cut-out (usually near the heating element or base) and find the small internal fuse. Use a multimeter to test continuity—no continuity means the part is blown and needs replacement. Regular descaling helps prevent limescale buildup that can trigger safety cut-outs and reduce heating efficiency.
Locate the Thermal Cut-Out
Before you test anything, you’ll need to find the thermal cut-out (TCO) or internal fuse so you can access and inspect it. Start by unplugging the kettle and letting it cool completely. Work on a clean, stable surface with good light.
- Remove the base or outer shell screws—often under rubber feet or the kettle base—then lift the housing carefully to expose the element and wiring.
- Look for a small cylindrical or disc-shaped component near the element or thermostat, usually held with clips, solder, or a connector; it’s often labeled TCO or thermal fuse.
- Note wiring orientation and take a photo before disconnecting so you can reassemble safely.
If you’re unsure, stop and consult a technician to avoid injury.
Check the Internal Fuse
How do you tell if the thermal cut-out (TCO) or internal fuse has tripped? First, unplug the kettle and let it cool completely. Remove the base or casing following the manufacturer’s instructions; don’t force clips or screws. Visually inspect the TCO or fuse for obvious signs: a cracked, melted, or discolored body, or a visible break in the element. Smell for burnt insulation—an indicator it blew. Check surrounding components for heat damage. If the device has a replaceable cartridge fuse, note its ratings stamped on the casing so you can source an exact replacement. Do not bypass a TCO or use a higher-rated fuse; that creates a fire risk. If you see damage or aren’t sure, stop and seek professional repair or replacement.
Test Continuity With Meter
A multimeter will quickly tell you whether the thermal cut-out or internal fuse is open; set it to continuity or the lowest ohms range, touch the probes to the fuse or TCO terminals, and listen/watch for a beep or near-zero resistance. Before you test, unplug the kettle and discharge any capacitors by waiting a few minutes. Remove the component if the contacts are hard to reach to avoid false readings.
- If you get continuity (beep/≈0 Ω), the fuse/TCO is closed and the problem lies elsewhere.
- If you get no continuity (infinite/high Ω), the fuse/TCO is open and needs replacement.
- Replace only with identical specs; follow safety guidance or consult a technician.
Identifying a Faulty Heating Element
Want to know if the heating element’s the problem? First, unplug the kettle and let it cool completely. Remove the base or housing per your model’s instructions so you can see the element terminals. You should’ve already checked continuity with a meter; if that was open, the element’s likely failed. Inspect the element visually: look for burns, blistering, breaks, or corrosion at the joints. Smell for persistent burnt odors—these point to internal damage. While still unplugged, check for loose or scorched wiring at the element connections; tight, clean terminals are essential. If the element shows physical damage or failed continuity, replacement is warranted—don’t try to repair a sealed or welded element. If continuity was OK but heating is weak, measure resistance against the manufacturer’s spec; significant deviation indicates partial failure. When in doubt, consult a qualified technician or replace the element assembly to avoid electrical hazards. Regular descaling with vinegar or lemon can help prevent limescale that may reduce heating efficiency.
Removing and Preventing Limescale Buildup
If your kettle’s heating seems slow or it has white crust inside, it’s likely limescale and you can remove it with a vinegar descaling: fill halfway with equal parts water and white vinegar, boil, let sit 30 minutes, then rinse and boil plain water twice. For stubborn deposits repeat or use a citric acid solution instead. To prevent repeat build-up, empty the kettle after use, use filtered water, and descale monthly if you have hard water. Many modern kettles also include boil dry protection as a safety feature to help prevent damage when heating elements run dry.
Descaling With Vinegar
How often have you checked for chalky buildup inside your kettle? Descaling with vinegar is a simple diagnostic step when heating falters. You’ll identify scale, remove it safely, and restore contact with the heating element.
- Add equal parts white vinegar and water to cover the affected areas, boil briefly, then let sit 30–60 minutes to loosen deposits.
- Pour out solution, scrub gently with a soft brush or cloth to avoid scratching the element, then rinse thoroughly at least three times to remove vinegar residue.
- Refill and boil plain water once; discard to ensure taste and eliminate remaining particles.
Wear gloves and vent the area. If scale persists after one treatment, repeat once more; heavy scale may need professional attention.
Preventing Future Build-up
Now that you’ve removed scale, you’ll want to stop it coming back so your kettle keeps heating efficiently. Regular maintenance prevents performance loss and safety hazards. Empty and dry the kettle after use, descale monthly in hard water areas, and use filtered water if possible. Check seals and the heating element for deposits; replace damaged parts. If you notice slow boil times or odd noises, descale immediately.
| Action | Frequency |
|---|---|
| Empty & dry after use | After each use |
| Descale (vinegar/citric) | Monthly or as needed |
| Use filtered water | Continuous |
| Inspect seals/elements | Every 3 months |
Follow manufacturer instructions and unplug before maintenance. Wear gloves when handling descaling solutions. Regular checks keep heating efficient and reduce electrical risk.
Checking for Loose or Corroded Internal Connections
Wondering whether loose or corroded connections are the culprit? Don’t power the kettle while inspecting it. Unplug, let it cool, and open the base only if you’re comfortable with basic tools. Look for green/white corrosion, blackened contacts, or wires that pull away from terminals. If you see damage, stop—replace parts or get a qualified repair.
- Visual check: Inspect solder joints, screw terminals, and plug points for corrosion or looseness. Wiggle wires gently; no movement should be present.
- Clean and tighten: If minor surface corrosion is visible, clean with a soft brush and a contact cleaner rated for electronics, then tighten screws to manufacturer torque if listed.
- Test for continuity: Use a multimeter to verify continuity across heating element leads and connections. No continuity indicates a broken connection that needs repair.
If you’re unsure, don’t risk safety—consult a technician to avoid shock or fire hazards. Many Orpat kettles use stainless steel bodies that can help reduce corrosion when properly maintained.
When the Thermostat or Temperature Sensor Fails
When the kettle won’t heat or keeps clicking off early, the thermostat or temperature sensor may be at fault — these parts tell the heater when to shut off and if they fail you’ll get no power to the element or intermittent operation. You’ll notice rapid cycling, kettle shuts before boiling, or no heat despite power. Don’t assume the element is bad first — sensors fail more often on older or frequently boiled kettles.
| Symptom | Likely cause |
|---|---|
| Kettle clicks off quickly | Faulty thermostat contact |
| No heat but power light on | Open sensor circuit |
| Heats intermittently | Intermittent sensor/thermostat |
| Boils then won’t switch off | Stuck closed thermostat |
| Burn smell or scorch marks | Sensor wiring short |
Diagnose by observing behavior and checking continuity at the thermostat/sensor with the appliance unplugged and cooled. If you see physical damage, corrosion, or inconsistent continuity, replace the sensor assembly or seek professional service. Prioritize safety: always disconnect power before inspecting internal parts. A quick check of the kettle’s descaling and maintenance history can often reveal mineral buildup that contributes to sensor and element problems.
Safe DIY Repairs and Tools You’ll Need
How comfortable are you with basic electrical work and small tools? If you’re cautious and willing to follow safety steps, you can do simple diagnostics and repairs: unplug the kettle, let it cool, and work in a dry, well-lit area. Avoid touching live parts and wear gloves if metallic components are exposed.
- Multimeter — use it to check continuity of the heating element, fuse, and switch; confirm there’s no power with the kettle unplugged before probing.
- Screwdrivers and nut drivers — needed to open the base and access terminals without stripping fasteners; keep a tray for screws.
- Heat-resistant gloves and insulated pliers — protect against sharp edges and accidental contact with residual heat or conductive parts.
Start by testing obvious components (power cord continuity, element resistance, thermostat continuity). Replace only simple, identical parts and reassemble carefully. If you hit corrosion, burnt smells, or complex wiring, stop and consider professional help. Many modern kettles also include auto shut-off features that can affect operation and should be checked during troubleshooting.
When to Replace the Kettle or Seek Professional Repair
After you’ve run basic checks and only simple parts were replaced, decide whether to keep repairing or call a pro based on cost, safety, and age: if the kettle has serious corrosion, a burnt wiring smell, a non-replaceable sealed element, or repeated failures, it’s safer and often cheaper to replace it or get professional service; likewise, if the repair cost approaches half the price of a new kettle, or the model is older than about five years and lacks warranty support, consider replacement.
If you detect exposed or brittle wiring, scorched insulation, or water inside electrical housings, stop using the kettle and seek professional repair or replacement immediately. For intermittent faults tied to switches or connectors, a qualified technician can diagnose safely. Don’t attempt high-voltage or sealed-element repairs yourself. Keep receipts and documented symptoms to help a repair shop assess value. When safety, reliability, or repair cost is unfavorable, replacing the kettle minimizes risk and often provides a better warranty and longer service life. Boiling water can cause steam-related burns, so always follow safety precautions when handling or testing an electric kettle.
Frequently Asked Questions
Will a Repaired Kettle Void Its Warranty?
Usually, yes: if you or an unauthorized repairer opens the kettle or replaces parts, it can void the warranty. Check your warranty terms, use authorized service, keep receipts, and avoid DIY repairs to preserve coverage.
Can a Microwave Heat Kettle-Safe Water Instead?
Yes — you can heat kettle-safe water in a microwave, but don’t pour a superheated cup; it can erupt. Use a microwave-safe container, short intervals, stir between heats, and handle with care to avoid burns or damage.
Are Cordless Kettles Harder to Diagnose?
Yes — cordless kettles can be harder to diagnose because you’re dealing with a removable base, hidden contacts, and integrated controls. Check base power, contact cleanliness, and kettle sensor connections; unplug before inspecting for safety.
Is It Safe to Boil Milk in an Electric Kettle?
You shouldn’t boil milk in a standard electric kettle; it’ll scald, foam, and clog heating elements. If you must, use a stovetop or specially designed milk warmer, and clean residue promptly to prevent damage and odors.
Can Mineral-Free Distilled Water Prevent All Failures?
No — distilled water reduces scale and can prevent many heating issues, but it won’t stop electrical faults, thermostat failures, corrosion from impurities in other components, or mechanical wear; you’ll still need proper maintenance and inspections.